Showing posts with label Fresh Prints Designer Series Paper Stack. Show all posts

Saturday, March 15, 2014

Save your scraps!

Hello!  I wanted to show you two cards I made that are made with scraps.  It's hard sometimes for me to throw away stuff when I think it can be used again for something else, so I've been known to save EVERYTHING from time to time.  But it does come in handy when you need just a portion of a piece of paper, rather than cutting or punching into a whole piece of paper.  I don't know about you, but when I don't have any scraps in a color, I hate having to cut into a whole sheet of paper just for a 1'' circle.  So, that's why I save my scraps.
Here are two cards I made with scraps from the Fresh Prints Designer Series Paper Stack.  Most of these pieces were left over, so I came up with the design for the card pretty quickly.


The other pieces were left over from another class that I had in February, and then I stamped my Thank you greeting from the Starburst Sayings stamp set and punched some circles and cut out the starbursts with my Starburst Framelits.  The banners I cut by hand, but you can use the Banner Framelits if you have those.  The colors I used were Real Red, Costal Cabana, Whisper White, Baked Brown Sugar, and Crumb Cake.  I punched out my heart with the small heart punch in the Silver Glimmer Paper, and that was it!  Thanks for stopping by today, and I'll see you tomorrow!

Sunday, March 9, 2014

You Make Me Happy Card

Hello!  Today I wanted to share a card made with the stamp set Hello Lovely.  I started out with an idea in mind, but it came out different than I had planned.  I was still happy with the results though.  I gave this card to my husband the other day.  I was excited to give it to him, and he was happy to receive it!
I also used a piece of paper from the Fresh Prints designer series paper stack in the occasions catalog.

The colors used on this card are Real Red, Whisper White, and Soft Suede.  I added two silver glimmer hearts punched with the mini heart punch.  Thanks for stopping by today, and I'll see you tomorrow!

Tuesday, February 4, 2014

Valentine Treats!

Hello!  I'm totally excited for Valentine's Day and am having a lot of fun making treats for everyone I know!  Here's another treat I came up with a week or two ago.  This is pretty simple because I came up with it on the fly as a bonus project at my card class, but it's still cute in my opinion!

 I used the bags from the Twisty Treats Sale-A-Bration kit, and made some quick tags with the Perfect Pennants stamp set, Oh Goodie stamp set, and the Hearts A Flutter stamp set and framelits. I tied off the bags with the silver 1/8'' ribbon from the occasions catalog.  I filled my goody bags with Peanut M&M's and Cherry Hearts.

This is another one of the Sour Cream Heart shaped containers that I cased from Jenni Pauli.  I forgot to show you this one the other day, but I think this one is my favorite of all the ones I made.  I hated to give it away, but I can always make another!  This was made super quick thanks to the Fresh Prints Designer Series Paper stack and my 1 3/4'' circle punch!  Thank you for the idea Jenni!  She's a super talented Demonstrator from Germany.

Thanks for stopping by today, and I'll see you tomorrow!

Sunday, February 2, 2014

Heart Sour Cream Containers

Hello!  I found an easy tutorial on my favorite blog by demonstrator Jenni Pauli on how to make these sour cream containers into heart shaped ones for Valentine's Day.  Jenni made some really cute ones, and I was so excited to case them!  You can view her blog at: www.paulinespapier.de to see her tutorial for the sour cream containers.  Here's my take on them:


I made these super quickly with the new Fresh Prints Designer Series Paper Stack.  The papers are already cut to size for this project, and all you need is some Sticky Strip or Multipurpose Liquid Glue from Stampin' Up! to finish them off.  I decorated them with a mini clothes pin, a tag stamped with the Tags 4 You stamp set in Blushing Bride, 2 3/8 Scallop Circle punch punched out of Costal Cabana Cardstock, Small Heart Punch in Real Red, and some of the 1/8 Silver Ribbon.  I had fun making these and hope you enjoyed today's post!  Thanks for stopping by, and I'll see you tomorrow!

Thursday, January 16, 2014

New Tag Topper Punch Candy Favors

Hello!  I love the new tag topper punches in the occasions catalog from Stampin' Up!  They scream endless possibilities to me!  I've seen lots of great things made with these punches, and I'm loving the candy favors that are so popular and so easy to make with them!  Here's a sample designed by my friend Jamie Garrett that I made last weekend with my demonstrator friends.
I started with a 6 1/2 x 2" strip of paper, punched each end in the tag topper punch, and then scored at
2 5/8", flipped it, and scored again at 2 5/8".  Then I put a Hershey's Nugget inside with a little adhesive to make it stay, tied off the top with the Costal Cabana Stretchy Ribbon and some of the Silver  1/8" Ribbon from the Holiday and Occasions catalog.  Then we stamped the Love Ya from the Just Sayin' stamp set in the Occasions Catalog, and cut it out with the matching Word Bubbles Framelit, stuck it on with some dimensionals, and added a small punched heart with a glue dot.  Easy!  I love easy!  And look how cute it is!  These would make great wedding favors, baby shower favors, bridal shower favors, birthday party favors, and lots of other great things!  Now I need to add the two new tag topper punches to my ever growing wish list from the Occasions catalog!
 The colors used for this project were Costal Cabana and Real Red.  The paper is from the new Fresh Prints Designer Series Paper stack in the Occasions Catalog.  Love this paper!!!!!
I hope you enjoyed today's post and that it's given you some great ideas!  Thanks to Jamie for the idea and supplies to make this little gem! Thanks for stopping by today, and I'll see you tomorrow!  I still have loads of stamped things to share with you from the weekend!

www.williamsali.stampinup.net

Sunday, January 12, 2014

Birthday Card and exciting news!!!!

Hello!  I have so much to share with you today!  Yesterday I stamped with a few of my good friends, and I came home with tons of fun stuff to share with you!!!  Enough to share for almost two weeks.  I'm really excited and love all the stuff my friends came up with for us to all make.  I got to play with almost everything from the new Occasions catalog, and I'm in love with everything!  Funny how things change once you see items in person!  The first card I want to share is one I created for all of us to make.  I cased it from demonstrator Angela Rich.  I had all the supplies to make the card, which is rare, so it was easy to re-create!  I only switched out the stamp, because I'm in love with the new stamp set Another Great Year.  The patterned paper is from the Fresh Prints Designer Series Paper stack, and I cut out the Costal Cabana starburst with the new Starburst framelits dies.  Easy!!!  I wrapped some linen thread around my patterned paper, cut the bottom into a flag shape, punched out a few red circles with a hole punch, and then hand cut out my stamped greeting to make it fit my card.


Colors used on the card: Crumb cake (ink), Real Red, Costal Cabana, Baked Brown Sugar and Whisper White.


Next exciting thing I wanted to share:
While my friends and I were stamping yesterday, we all realized we had trouble telling apart some of our supplies (since we're all Stampin' Up! demonstrators and buy the same products :)   ), so when I got home, a light bulb went off in my head.  Instead of labeling our clear blocks we use for the clear stamps, why not use washi tape around the edges to indicate whose blocks/supplies are whose?  You can use a sharpie marker or something like that to mark your blocks, but over time, with use, the sharpie will wear off, and then the problem is back.  Whose blocks are whose?  So I pulled out some of my washi tape and just wrapped it around the sides of the blocks.  It's not permanent, so if I decide later I want to take it off, I can.  But it also will not wear off with use.  You could also use bakers' twine or linen thread to tie around the sides of your blocks if you don't have washi tape or don't want to use washi tape, or need a different way to mark your blocks than your friends.
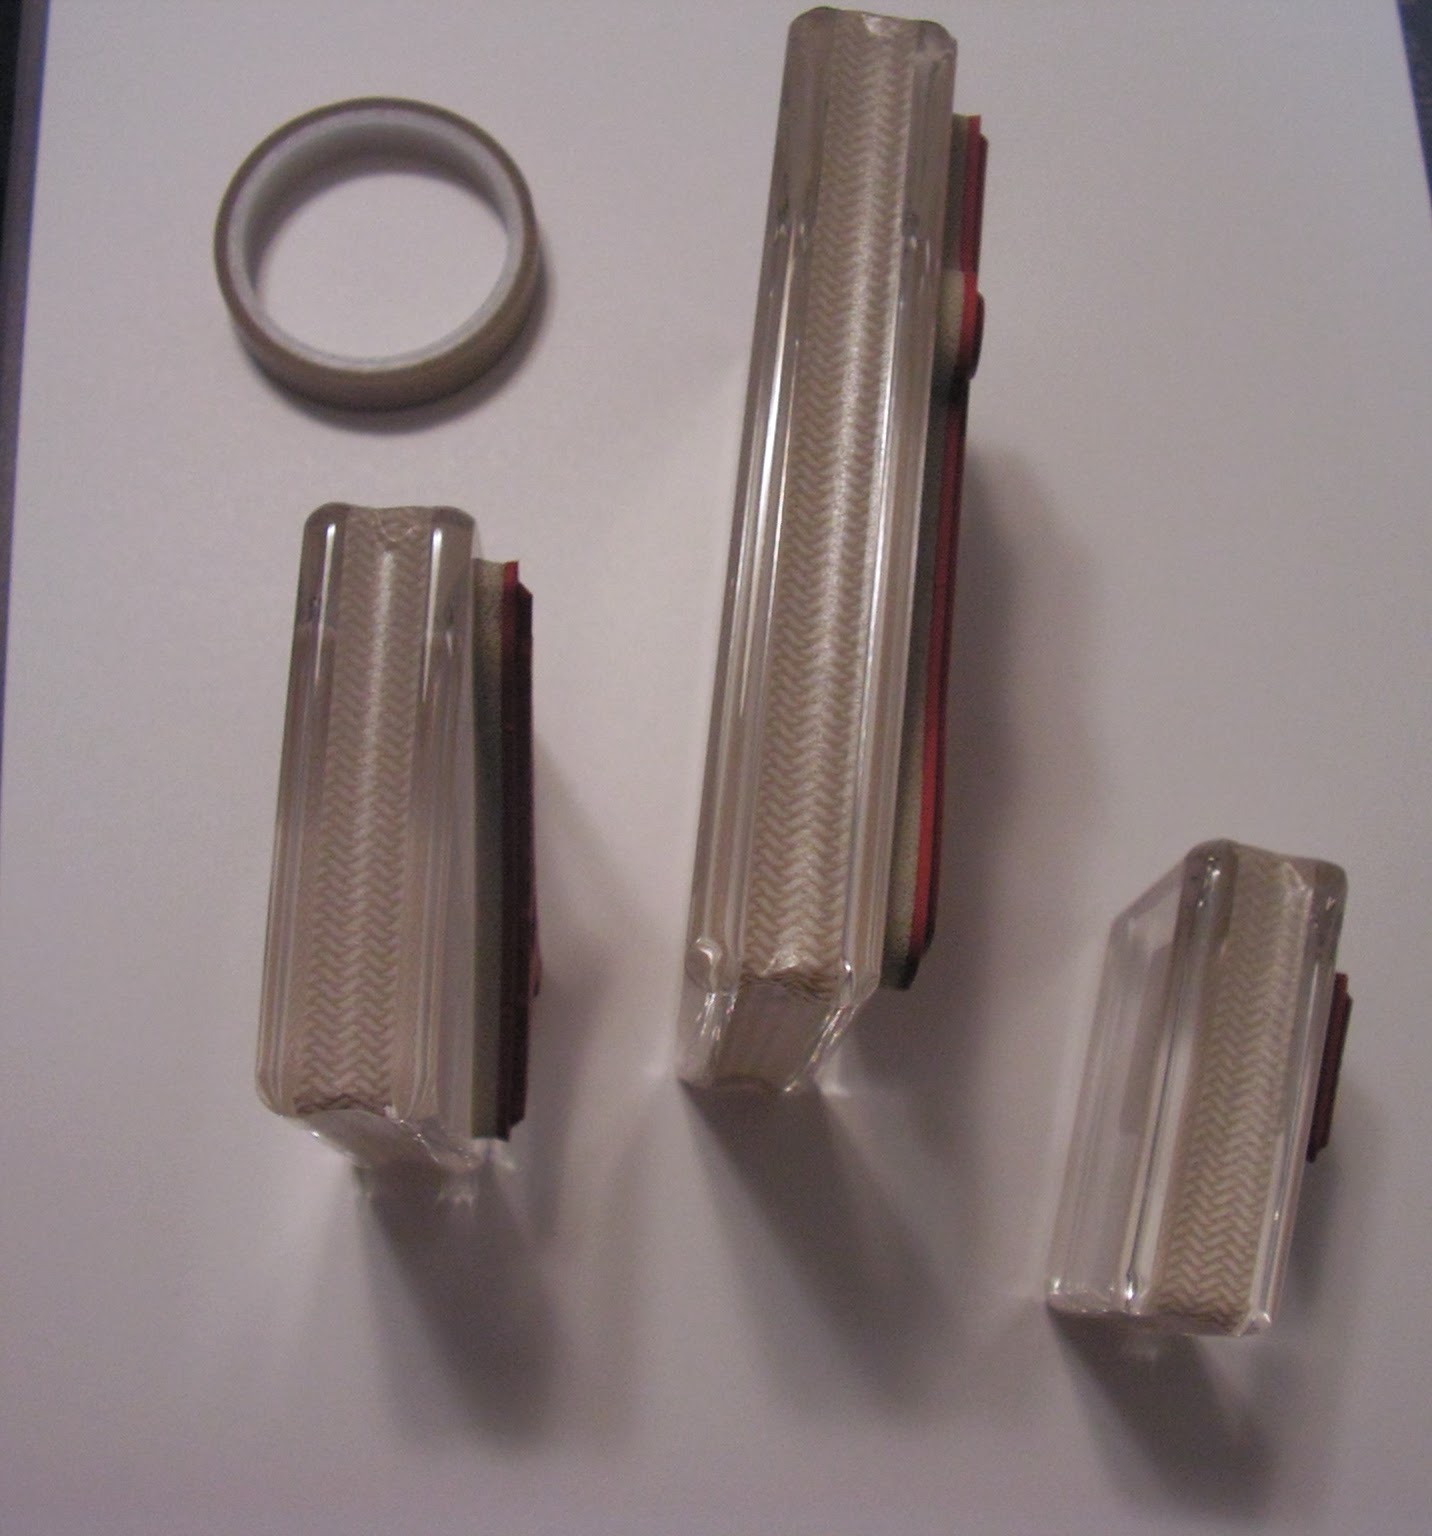


I was excited about my little discovery!

And my last bit of exciting news is that Stampin' Up! just announced that all new demonstrators that sign up between July 1, 2013 and the close of Convention registration 2014 may attend the 2014 Convention for free!!!!!!!   That's a huge announcement!!!!!  I went to convention last year and FELL IN LOVE with it!  I almost died from all the fun and excitement!  But I have to pay to register every year that I go, and who has $300 to spare?  Not me.  So this is a great deal, by far!  If you haven't signed up yet and want to attend convention in July with me, sign up now!  I'd love to have you join my stamping team!  Contact me if you have questions about signing up/benefits, etc.  It's only $99 to join, you can customize your starter kit with all the products you like, and then your convention fee for this year is waived!  Great deal!!!!  Contact me if you would like to join and have questions, or if you would like to get more information about becoming a demonstrator, I'd be happy to answer your questions!

Thanks for stopping by today, and I'll see you tomorrow!  I have tons more fun stuff to share!!!!